


Are you looking for an eco-friendly and cost-effective way to create cheerleading pom poms? This guide will walk you through the process of transforming ordinary plastic bags into vibrant and durable pom poms. Whether you’re crafting for a school event, a team spirit activity, or a fun DIY project, this tutorial provides a detailed, step-by-step framework to ensure professional-looking results. By reusing plastic bags, you’ll not only save money but also contribute to reducing waste, making this project both sustainable and practical. From gathering necessary materials to assembling and fluffing the pom poms, this blog covers every aspect to help you create eye-catching cheerleading accessories.
What are the Key Steps to Make Pom Poms Out of Plastic Bags?

- Gather Materials
Collect several clean plastic bags, scissors, and elastic bands or strings. Ensure the plastic bags are free of dirt and debris for a better appearance.
- Prepare the Plastic Bags
Flatten each bag and cut off the handles and bottom seams. This will leave you with a tube of plastic, which should then be cut into strips approximately 1 inch wide.
- Bundle the Strips
Gather the cut strips together into a stack. The more strips you use, the fuller the pom poms will appear.
- Secure the Center
Use an elastic band or string to tightly tie the stack of strips together at the center. This forms the base of the pom pom.
- Fluff and Shape
Separate and spread out the individual plastic strips to create a fluffy, spherical shape. Trim any uneven edges to achieve a uniform finish.
By following these steps, you can efficiently repurpose plastic bags into functional and visually appealing pom poms.
Step 1: Gathering and Preparing Plastic Bags
To begin, collect a sufficient number of clean, dry plastic bags. Avoid bags with excessive tears or damage, as these may compromise the final quality of the pom pom. Flatten each bag to remove wrinkles, and cut off the handles and bottom seam with scissors. This will leave you with rectangular sheets of plastic that can be stacked and cut into uniform strips. Proper preparation ensures consistency and ease in the subsequent assembly steps.
Step 2: Cutting the Plastic Bags into Strips
To ensure consistency while cutting, the plastic sheets should be staked neatly in piles. The sheets should be measured and cut into strips 1 inch wide using a sharp rotary cutter or very fine scissors and a ruler. The strip widths should remain consistent to get the best results throughout the process. Extremely thin strips would not allow the pom pom to be very full, whereas overly wide strips would make assembly more difficult. A well-organized work area reduces variablity which greatly increases efficiency. Cuts have to be properly made to ensure every piece works well with the settlements for a cohesive and clean finish.
Step 3: Assembling the Pom Pom Layers
Start by arranging the plastic strips on top of each other , ensuring the edges of each strip align. Folding these strips will make it easier to pleat. After folding, use string or twine to tightly secure the middle of the platter. Finally, use scissors and twine to cut the end of this string so the pom pom has a fixed rounded feature.
Now, use scissors to tidy the sides of the stack and create a hose shape. After the sides are trimmed, pull the layers of plactic strips from the center of the pom pom for proper flufing. Remmber to fluff the layers evenly for a more filled look. These tips can help ensure the pom pom is presentable to the eyes. You can repeat the prcess for each layer of strips to create more pom poms.
Step 4: Securing and Fluffing the Pom Poms
To begin the final step, ensure the pom pom is tightly secured where the layers are tied in the center. This prevents any loosening during handling or display. Use extra string if needed to reinforce the central knot. Once secure, gently separate each layer of the plastic strips outward, starting from the innermost layers and moving to the outermost. This process creates a fuller, more rounded shape while ensuring even distribution of the material. For optimal fluffing, alternate between pulling layers on opposite sides to maintain symmetry. If uneven edges remain visible, use scissors to trim and refine the overall shape. Fluff each pom pom thoroughly and adjust as necessary to achieve a polished and professional appearance.
What Materials Do You Need to Create DIY Pom Poms?

To create DIY pom poms, you will need the following materials:
- Plastic strips or tissue paper, cut into evenly sized layers.
- String or twine for tying the layers securely at the center.
- Scissors for cutting and trimming the materials.
- Ruler or measuring tape to ensure consistent dimensions for the strips.
These simple materials are sufficient to craft vibrant and professional-looking pom poms.
Using Scissors To Cut Plastic Bags
In the production of bulging business forms, plastic bags need to be ordered meticulously and with high precision. Start with removing any manifold folds from the plastic bag and proceed with folding it in a particular order so it fits in manageable levels. Then proceed with cutting the folds using a sharp clean scissor, but do so while making sure the cut is consistent with the other cuts. To guarantee uniform strips, a ruler along with a non-permanent marker can be utilized to mark boundaries for cuts. The set goal is to achieve identical widths to ensure balance in the end output. Oftentimes check the scissors to ensure they remain sharp, as dull scissors can serrate the plastic which will lead to a lack of uniformity at the edges. Any leftover items must be disposed of in a manner that is aimed at achieving minimum waste and cleanliness.
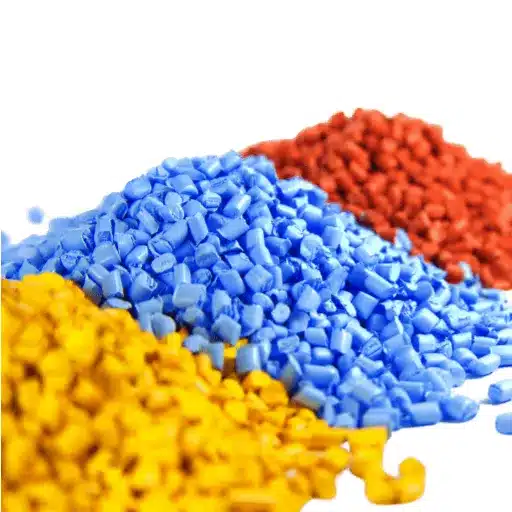
Choosing the Right Type of Plastic Bags
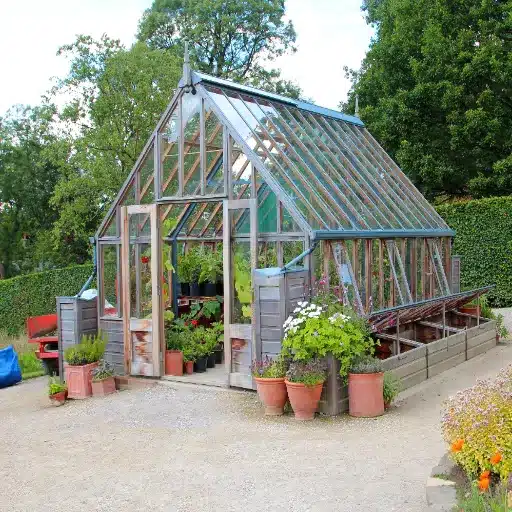
Precise selection of plastic bags is particularly important for achieving the desired outcomes of any project or task. The selection of the plastic bag in question depends on composition, grade, purpose, and a host of other factors. Lightweight, tough, and cost-effective, High-Density Polyethylene (HDPE) bags are best suited for carrying lightweight items. Low-density polyethylene (LDPE) bags are thicker and more flexible, better suited for applications that need durability or puncture resistance. For food-specific needs, bags made from polypropylene plastic, or even biodegradable bags, may be better due to their moisture-resistant or eco-friendly characteristics. Also, the bags must be assessed as to size, closure type, and environmental concerns like ease of recyclability. Adequate attention to detail to this specification will foster efficiency and sustainability.
Additional Tools for Making Pom Poms
When crafting pom poms, the right tools can streamline the process and ensure consistent results. Aside from yarn and scissors, consider using a pom pom maker, which allows for uniform size and density. Cardboard templates are an alternative for shaping if a pom pom maker is not available. A small, sharp pair of scissors is essential for precise trimming and shaping of the pom poms. Additionally, a comb or brush can be used to fluff the yarn fibers for a fuller appearance. For projects requiring attachment, a strong needle and thread are necessary to secure the pom poms to fabrics or other materials. Investing in the correct tools not only simplifies the crafting process but also enhances the quality of the final product.
How Can You Use DIY Pom Poms for Cheerleading?

Handmade pom poms can easily be integrated into cheerleading routines to create better visuals and provide overall better value-added engagement for the audience. To enhance team identity and unity, they can be made in team colors which can be utilized during performances. Lightweight materials of specific custom sizes make them easy to use without hindering dynamic movement, stunts, and other features. For choreography, these pom poms can be modified to meet these requirements by adjusting size, texture, or color combinations. Moreover, school or community groups can create these ucherspoms internally to save money while maintaining their look. Additional features such as grip and handle options should be placed on the pom poms to improve durability and functionality during hyper-energetic scenes.
Creating Cheerleading Pom Poms from Recycled Materials
Creating cheerleading pom poms using recycled materials is an innovative and sustainable approach that promotes environmental consciousness while reducing costs. Key materials like leftover gift wraps, newspapers, old plastic bags, or ribbon scraps can be repurposed effectively. To assemble, cut the chosen material into uniform strips, around 12 to 14 inches long, for optimal visual impact and flexibility. Bundle the strips together at the center, securing them with durable tape or zip ties, and attach a sturdy handle made from recycled cardboard or a plastic bottle top for enhanced grip.
For a professional finish, trim the edges to create a uniform shape and fluff the material to maximize volume and visibility. These DIY pom poms can replicate the vibrant motion of commercial pom poms while fostering creativity and team collaboration. Not only is this method cost-efficient, but it also contributes to reducing waste and aligning with eco-friendly practices in school or community initiatives.
Customizing Pom Poms for Your Team
Custom pom pom designs can be created by considering the team colors furthers branding and marketing goals. To start, gather supplies in the team’s colors like tissue paper, fabric remnants, or even recyclable plastic in colors corresponding to the logo or mascot. If your team has dually focused colors, one can create more appealing effects by using dual or multi-colored stripes. If the focal color is more than one, the strips can be alternated for a more striking appeal.
Next, consider more unique and personal additions such as team glitter, logos or initials to further customize the pom poms. These can be further affixed through handles by sewing lightweight fabric patches or affixing decals to the handle or fabric changer. Additionally, the size of the pom poms can also be controlled for impact; bigger for more dramatic effect and vice versa for kids to ensure the accessories are suited for age.
In the end, denser strips sewn into the pom have a direct correlation to its dynamic visual appeal; more strips = fuller and brighter alongside more appealing routines. With these strategies, not only are your team’s pom poms easier to spot, but they also act as a statement of unity.
Incorporating Pom Poms into Cheer Routines
In the context of cheerleading, pom poms serve as valuable accessories to performance, both for sight and sound. Synchronization is the first step towards effectively using pom poms in a dance. To pose, perform, and put on stunning shows, timing, and movement with the pom poms are very important. As choreographers tend to do with other instruments, they set rhythms and assign specific movements where participants using pom poms will perform high V’s, cross-over sweeps, or circular spins that correspond with the energetic beats of the music.
To reach the greatest effect, pom poms are usually used during stunts, formations, or transitions in the routine. Their bright colors and movement create an eye-catching element that reinforces stances in the performance. Another method utilizes cheerleader pom poms whereby a formation spelling out the names of the teams or structures creating shapes by the combination of synchronized ripples from the group members.
Moreover, pom poms enable performers to have a solid point of hand contact that helps them maintain accuracy, thus serve functional uses. In the interest of maintaining cheer squad durability and aesthetic attractiveness, it is also wise to use high quality light weight materials that are easy to use, retain glee shapes and pom pom colors and look great on stage light and enduring long shows.
How to Achieve the Best Fluff for Pom Poms?

The fluff in pom poms requires preparation and maintenance for best results. To start, the pom pom should be shaken so that the streamers separate and spread out nicely. The fluffing process is especially useful for the new pom poms where streamers can be pulled apart and snapped outwards to add volume. Furthermore, they should be placed in a dry and open area to avoid damage caused by compression and prevent excessive moisture which can warp the materials or cause clumping. Using high-grade materials with resilient plastic or metallic fibers optimal fluff and shape retention during repeated use.
Techniques for Fluffing Plastic Pom Poms
Fluffing plastic pom poms effectively requires careful attention to technique and materials. Start by holding the pom pom firmly by its handle and manually separating the individual streamers using your fingers. For deeper volume, gently pull and snap the streamers outward to create a fuller effect. Shaking the pom pom vigorously can further distribute the strands and prevent tangling. For compacted or flattened pom poms, soak them briefly in warm water to relax the fibers, then allow them to air dry completely in a well-ventilated area to restore their shape. Avoid exposure to excessive heat or direct sunlight, as it can warp the plastic fibers and reduce the longevity of the pom pom. Periodic maintenance and storage in an open, dry container will preserve their fluff and structure over time. For optimal results, ensure the pom poms are made from high-quality plastic materials designed for durability and color retention.
Common Mistakes to Avoid When Fluffing
- Using Excessive Force
Pulling too hard on the streamers can cause them to tear or detach from the handle. Always use gentle and controlled movements when separating the strands to maintain the pom pom’s integrity.
- Skipping Proper Drying Techniques
If soaking the pom poms to restore their shape, failing to fully air dry them can lead to mildew growth or a misshapen structure. Ensure the pom poms are completely dry before storing or using them again.
- Exposing Pom Poms to Heat
Using blow dryers or leaving pom poms in direct sunlight can melt or warp the plastic fibers, permanently damaging their appearance. Always dry them naturally in a shaded, ventilated area.
- Neglecting Storage Conditions
Storing pom poms in cramped or damp spaces can cause tangling, flattening, or mildew. Instead, keep them in a spacious, dry container that allows enough room to maintain their fluff.
- Ignoring Regular Maintenance
Allowing pom poms to stay compressed after use can make it harder to restore their shape. Take time to fluff them regularly and ensure they remain stored in an open position to prolong their lifespan.
What are the Benefits of Making Pom Poms from Plastic Bags?

Making pom poms out of plastic waste bags has notable environmental and pragmatic benefits. One, it encourages more recycling by transforming disposed plastic items, hence decreasing both pollution and waste. Repurposing items in such a creative manner is very sustainable. Two, considering the physical characteristics of the bag, pom poms made out of trash bags can be used for different functions including outdoor activities. The trash bag’s strong and non-moisture absorbing qualities protect the pom poms from damage. Furthermore, the low cost and widespread availability of plastic bags make this an accessible and affordable craft option for individuals and organizations.
Environmental Impact and Upcycling Benefits
Utilizing the environment poses constructive challenges for both managing the depletion of resources and control mechanisms in the form of waste plastic. Transforming plastic bags into pom poms and other artifacts reduces the need for new resources, thus, lowering carbon emissions. Non-biodegradable waste that sits around in landfills while taking centuries to break down can be reduced by converting these waste bags into functional pieces of art. Furthermore, it expands the frontier by fostering awareness of the use of sustainable plastics. More so, upcycling promotes waste to be turned into usable products instead of being thrown away or burnt. The flexibility and ease of recycling further encourage the transformation of waste products into usable forms.
Cost-Effectiveness of DIY Pom Poms
Creating DIY pom poms can be highly cost-effective when compared to purchasing pre-made options. The materials required, such as yarn, scissors, and templates (commonly cardboard or plastic pom-pom makers), are inexpensive and widely available. For example, a single skein of yarn, which can produce multiple pom poms, typically costs between $3 to $5, while a pom-pom maker may be an initial investment of $5 to $10 but is reusable across numerous projects. By contrast, pre-made pom poms often range from $1 to $3 per piece, depending on size and quality, making DIY a more economical choice, especially for larger quantities.
Additionally, crafting pom poms at home allows for customization in size, color, and material, providing flexibility to suit specific project requirements, such as decorations, garments, or crafts. While the process requires time and effort, many find it rewarding and sustainable since leftover yarn scraps can be repurposed, reducing waste. Overall, DIY pom poms offer significant savings and adaptability, particularly for bulk crafting needs.
Creative Expression and Customization
When people want to express creativity, there is an opportunity to modify work or personal projects in meaningful and unique ways. Customization enables the combination of personal factors such as certain designs, themes, or functions which allows the results to meet one’s tastes or requirements. This idea is reported to exist in many places from art and design to software applications and hardware peripherals where instruments and systems are used in a non-standard way. Customization increases and fosters creativity, augments user functionality, and promotes innovation by departing from set rules or templates, as the top websites suggest.
References
Frequently Asked Questions (FAQ)
Q: What materials do I need to make cheerleading pom poms out of plastic bags?
A: To make plastic bag pom poms, you will need plastic grocery bags, scissors, and a piece of cardboard. Optionally, you might want to use painter’s tape to secure the handles of the pompons.
Q: How do I prepare the plastic bags for making pom poms?
A: First, lay the plastic bags flat and smooth out any wrinkles. Then, use scissors to remove the handles and the bottom seam of the bags. This will leave you with a tube of plastic that you can cut into strips for your pompons.
Q: How many plastic bags do I need to make a full pom pom?
A: To make a full plastic bag pom, you will typically need about 8-10 grocery bags, depending on how fluffy you want your pom poms to be. More bags will result in a fuller pompom.
Q: What is the step-by-step process to make plastic bag pom poms?
A: First, gather and prepare your plastic bags by cutting them into strips. Next, take a piece of cardboard and wrap the strips around it multiple times. Then, slide the wrapped strips off the cardboard and tie them tightly in the middle. Finally, cut the loops at each end and fluff the pompom to give it volume.
Q: How do I fluff and shape the pom poms once they are tied?
A: After cutting the loops on both sides of the tied strips, take a couple of moments to shake and separate the individual strips to add volume. Trim any uneven ends to shape the pom poms to your liking.
Q: Can I customize the size of the plastic bag pom poms?
A: Yes, you can customize the size by adjusting the length and number of strips you use. For larger pompones, use longer strips and more plastic bags. For smaller ones, reduce the size accordingly.
Q: Are there any tips for making more vibrant pom poms?
A: For more vibrant pompons, consider using colored plastic bags or mix different colored bags to create a multicolored effect. You can also layer strips of different colors while wrapping them around the cardboard.
Q: How can I secure the pom poms to use them as cheerleading accessories?
A: After creating your bag pom poms, use painter’s tape to wrap around the tied middle, forming a handle for easy gripping. This will help keep the pom poms secure while you cheer.
Q: Are there any video tutorials for making plastic bag pom poms?
A: Yes, there are several videos about how to make plastic bag pom poms available on platforms like TikTok and YouTube. Searching for terms like “aircraft plastic bag pom poms” or “football Friday diy bag pom” can lead you to helpful tutorials.


