


If you’re not familiar with the right methods, painting polyethylene, one of the most common and robust plastics, can look a perishing work. This material, which is very unyielding and impervious to adhesion, needs precise preparation and specific tools in order to get a professional look and lasting finish. If you are to change the look of your household items or you want to go with outdoor furniture or even industrial parts, with the help of painting polyethylene, you are just going to unleash your creativity. In this manual, you will find a complete guide through all the necessary steps, from how to prepare the surface and which primer to choose, through to which paint to select and how to properly apply it. At the end of this post, you will possess all the knowledge required to change a dull polyethylene into a beautiful, personalized work of art.
Understanding Polyethylene and Its Types
1What is Polyethylene?
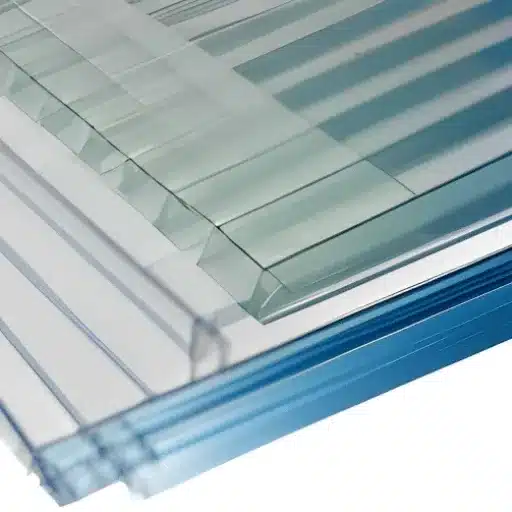
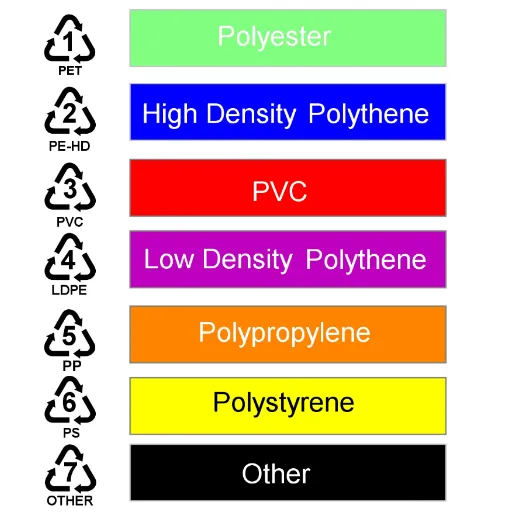
Polyethylene is a versatile thermoplastic polymer that is also called the king of plastics in the world because of its ubiquity. It is produced by the polymerization of ethylene gas and possesses various features such as longevity, resistance to chemicals, and versatility. Polyethylene has multiple grades, but the most widely used ones are Low-Density Polyethylene (LDPE), High-Density Polyethylene (HDPE), and Linear Low-Density Polyethylene (LLDPE). Depending on the application, each type has its characteristics; for instance, LDPE is normally used for making plastic bags and films because of its softness, whereas HDPE is preferred in making items like bottles, containers, and pipes due to its strength and rigidity. Its non-toxic, light-weight, and recyclable nature make it a go-to material in industries like packaging, construction, Automotive, Healthcare, and many more.
2Types of Polyethylene: HDPE and Others
Polyethylene has various kinds, and each type of it has unique properties that can meet different industrial and consumer needs. Among them, High-Density Polyethylene (HDPE) is the most reputable one owing to its robustness and versatility. HDPE has a wide range of famous applications thanks to its high strength-to-density ratio, such as industrial piping, fuel tanks, and plastic containers for which durability and impact resistance are major requirements. Besides, its high-temperature resistance, along with the low temperature resistance, grants it even higher versatility.
There is also a couple of polyethylenes other than HDPE, such as Low-Density Polyethylene (LDPE) and Linear Low-Density Polyethylene (LLDPE). LDPE has a very soft feel and is highly pliable, so it is mostly applied in making plastic bags, packaging films and gentle bottles, among others. Contrarily, LLDPE is characterized by plastic that is both soft and strong, and hence, it is used for manufacturing stretch wrap films and flexible tubing.
On top of that, an emerging polyethylene variant, Ultra-High-Molecular-Weight Polyethylene (UHMWPE), is remarkable for its outstanding abrasion resistance, thus being vigorously utilized in performance-oriented applications such as body armor, industrial bearings, and medical implants. Nevertheless, continued breakthroughs in polyethylene mixtures have not only expanded its application areas but also indicated its huge importance in different industries.
3Common Uses of Polyethylene in Everyday Items
Polyethylene is one of the most multifunctional and widely used plastics found in a multitude of daily products. High-Density Polyethylene (HDPE) is the main character surrounding the resilient household items such as milk jugs, detergent bottles, and grocery bags because of its strength and chemical resistance. The other category Low-Density Polyethylene (LDPE) assigns to itself product applications like cling wrap, trash bags, and squeezable bottles by straddling the flexibility continuum.
Lately, reports indicate that the dependence on polyethylene for designing sustainable products is on the rise. Recycled polyethylene, for instance, is being converted into biodegradable shopping bags and resalable packaging materials. Besides, cross-linked polyethylene (PEX) is such a robust and temperature-resilient material that it is heavily employed in modern plumbing. These innovations are not only highlighting polyethylene’s role in traditional and new applications but also declaring it as the most essential material in daily life.
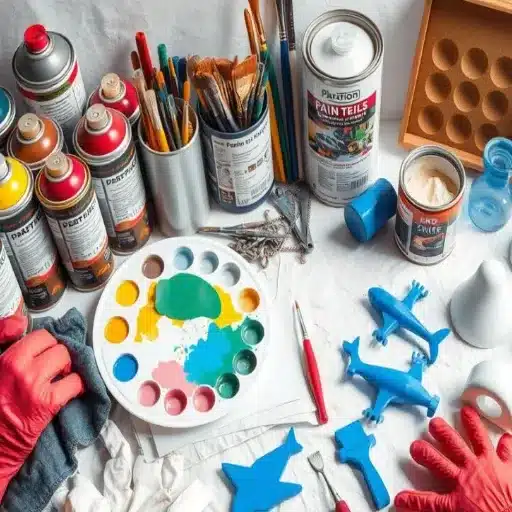
Preparation Steps for Painting Polyethylene
1Cleaning the Plastic Surface
The first and only task in the routine that is often neglected yet plays a very important role is the cleaning of the surface of the plastic. You are to start washing the surface clean with warm and soapy water for the purpose of removing dirt, grease, and other contaminants. Then, rinse off and dry the surface, then take a lint-free cloth with a mixture of isopropyl alcohol and water to wipe the whole area. The reason behind this is that the nonporous nature of polyethylene makes it very hard for it to let anything stick. Based on the latest research and professional recommendations, it is a good practice to apply fine-grit sandpaper to the surface after cleaning for better paint adhesion due to micro-abrasions being created. This whole process prepares the paint to stick to the plastic and thus a long-lasting and smooth finish is guaranteed.
2Surface Abrasion Techniques for Better Adhesion
In the case of such challenging materials as polyethylene, where pouring paint or coating would be the worst scenario, combining surface abrasion with good preparation is the key. A recent report by a trusted source, including ‘s search engine, asserts that fine-grit sandpaper (180-220 grit) has to be used for making micro-abrasions on the surface. Roughening up the surface just a little will enable the paint to get a mechanical grip that’s much better. Besides, cleaning with isopropyl alcohol or similar solvents is usually advised by manufacturers after the sanding procedure to get rid of the dust or any other pollutants that could hinder bonding. When these methods are applied as recommended, they profoundly increase the ability of paint to cling even to nonporous materials.
3Choosing the Right Environment for Painting
The place where you will be painting the most important factor that will either make or break the quality of professional results. Presently the conditions for painting are ideal, according to recent data and insights, when the temperature is in the range of 50°F to 85°F, since temperatures outside this range will affect the paint’s viscosity and drying time. Humidity is another important factor and keeping the relative humidity at about 40% to 50% will stop the paint from bubbling and drying unevenly. One more thing, adequate ventilation is necessary as it helps remove the fumes and speeds up the drying process. Going by ‘s search trends, a lot of people also point out that it is important to have the painting area free of dust and debris, either by working in a clean and closed space or covering the areas where necessary. The application will be easier and the paint produced will be of better quality if these conditions are created.
Selecting the Right Primer and Paint
1Primer’s Importance for Paint Adhesion on HDPE
Priming is a necessary procedure in coating HDPE (high-density polyethylene) surfaces, since it enables the proper adhesion and the long life of the paint. Due to the nonporous and smooth nature of HDPE, paints can’t stick properly without the right primer. Application of a specific primer for plastics generates a bondable surface by treating the substrate and making it more open to paint. Recent online searches indicate that many people are looking for information on primers that are explicitly designated for plastics, like acrylic or latex-compatible primers that are proven to be effective on HDPE.
Moreover, the primer-unprimed surface can lead to the ruin of the paint job through peeling, flaking, or possibly uneven application, which issues are commonly talked about in forums and online searches. For excellent results, it is advisable to use a primer with very good grip and to strictly adhere to the manufacturer’s guidelines about surface preparing and drying times. This customized procedure will guarantee that the HDPE surfaces will be painted successfully, offering a silky, long-lasting finish that will not only be attractive but will also meet the functional requirement of the users.
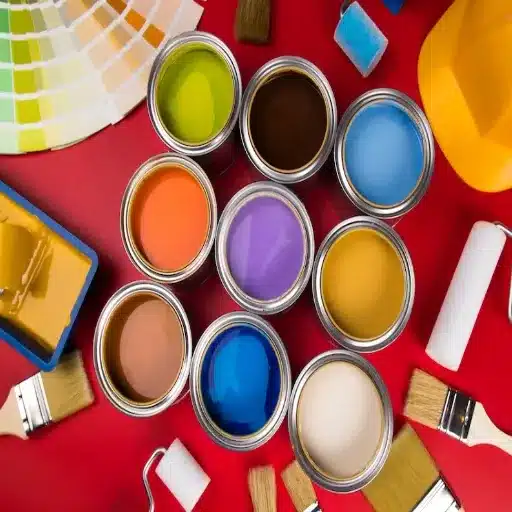
2Paint Types Fit for Polyethylene
It is of utmost importance to choose the right paint type when working with polyethylene (PE) to get a durable and good-looking result. As per the most recent data from the search engine of the site, two major types of paints are often suggested for polyethylene surfaces:
Acrylic-Based Paints:
Acrylic paints are tied for first place squarely with polyethylene as they provide a superior adhesion when used with the right primer. They have an extensive color and finish range and are also quite resistant to cracking and fading with the years. To be sure that the best results are achieved, it is a must to apply a primer specifically made for polyethylene before putting on the acrylic paint.
Epoxy Paints:
Paints containing epoxy resin are highly durable and resistant to a lot of chemicals and thus, are perfect for demanding installation or outdoor presence. Epoxy paints combine with polyethylene when the surface is adequately prepared, which most of the time involves sanding and the use of an adhesion promoting primer.
At the same time, some paint manufacturers market specialized spray paints that are specifically made for polyethylene and pumpy surfaces. These products are engineered with different adhesives that in certain instances make it unnecessary to do surface preparation. By adhering to these rules the best possible outcome will be achieved and the polyethylene project will have a professional finish.
3Product Recommendations for Primers and Paints
The choice of the right primer and paint can make a world of difference when it comes to working on polyethylene surfaces. Here are some of the top suggestions according to the latest developments and data from the ‘s search engine:
Incorporating these products into your painting process will ensure that you get the best adhesion, the most intense colors, and the longest durability for all your polyethylene painting projects. The manufacturer’s instructions should always be adhered to in order to attain the best results.
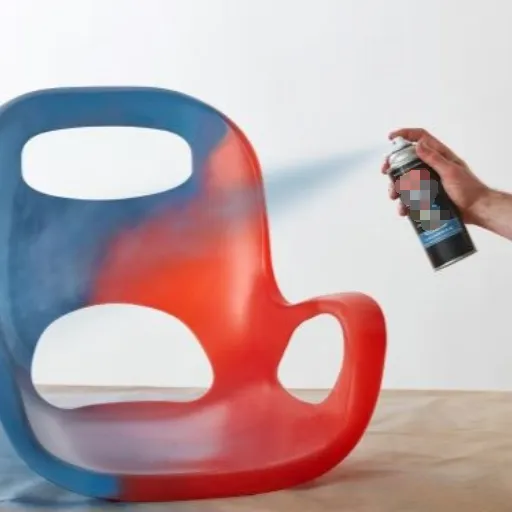
Painting Techniques for a Smooth Finish
Brush vs. Spray Painting: Pros and Cons
When it comes to polyethylene surfaces, the best option is either brush or spray painting. However, before making a final selection, it would be advisable to examine their respective merits and downsides in order to find a solution that will satisfy your project’s needs.
✓ Brush Painting Pros:
- Brushing provides precision and control, especially for small or intricately detailed projects.
- Also, it is economical for small applications with less paint wasted compared to spraying.
- Requires less equipment and set-up time, perfect for quick touch-ups and small areas.
✗ Brush Painting Cons:
- Surface will have visible strokes left by the brush affecting the overall smoothness of the finish.
- Slower application process, which is unsuitable for the large and expansive areas.
✓ Spray Painting Pros:
- The application of spray will produce a silky finish with no streaks or marks left, thus giving the appearance of polyethylene surfaces.
- It is an extremely fast method and hence highly efficient for large or even industrial-scaled projects.
- Flexibility of the spray allows it to get into the most inaccessible areas.
✗ Spray Painting Cons:
- Special equipment like a spray gun or aerosol cans is required, which increases costs.
- Paint overspray can occur, leading to waste and the need for protective measures for surrounding areas.
- Proper ventilation to avoid inhaling fumes is a must, thus adding to setup considerations.
While weighing both options, think about the size of your project, quality of finish desired, time limits, and budget. For example, brush might work well for art pieces requiring a lot of detail or touch-ups, while spray is often the choice for achieving professional-level, smooth finishes on large polyethylene surfaces.
Step-by-Step Guide to Painting Polyethylene
1Prepare the Surface
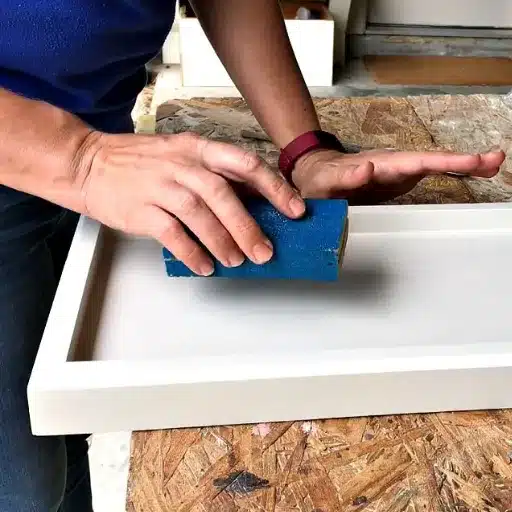
Cleansing the polyethylene surface should be the first step in painting. It should be cleaned very thoroughly to get rid of any dirt, grease, or debris. Mix some mild dish soap and water and using a sponge or cloth, scrub very gently. Rinse and let the surface dry completely. To make the bonding of primer and paint stronger, it will help to sand the surface lightly with 200-400 grit sandpaper; this will create slightly rough texture thus helping adhesion.
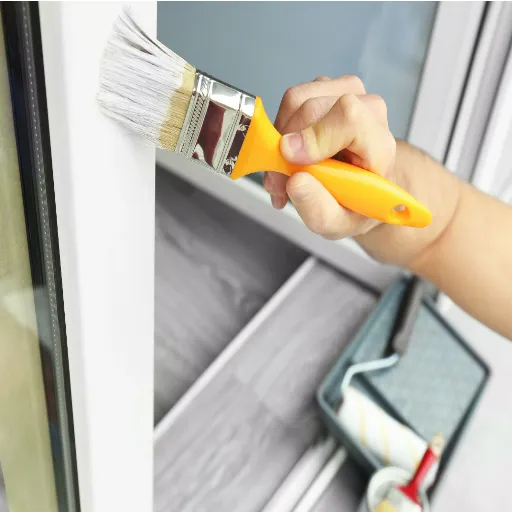
2Apply a Plastic Primer
Polyethylene being a non-porous material needs a primer that is specifically for plastics. A high-quality bonding primer is the best option, the one that is labeled for use with polyethylene or hard-to-coat surfaces is ideal. Apply the primer evenly in thin layers, letting each coat dry before applying the next. This step guarantees that the paint adheres strongly to the surface.
3Select the Right Paint
Research suggests using acrylic-based paints or especially spray paints for plastics in the case of polyethylene surfaces gives the best results. Pick a color and texture that fit your project’s requirements. If you use spray paint, check if it is marked “plastic-compatible” for maximum durability.
4Paint the Surface
Paint should be applied using even and consistent strokes. Keep layers thin and smooth if you are using a brush to prevent streaking or bubbling. For spray paint, hold the can approximately 8-12 inches from the surface and use sweeping motions to not have uneven coverage. Allow every coat to completely dry before applying another layer.
5Seal the Paint (Optional)
Apply a clear sealant or topcoat if you want to increase durability, especially for items subjected to regular wear and tear. Choose a plastic-compatible product and follow the manufacturer’s directions for the best outcome. This will safeguard the painted surface against scratches, fading, and moisture damage.
6Cure the Paint
The painted polyethylene object should be cured for 24-48 hours before handling or using, depending on the paint and sealant product recommendations. Proper curing guarantees thatthe paint will adhere and thus offer long-lasting results.
If these steps are followed and the suitable materials are selected, painting polyethylene can become a quick and successful process. This technique is in line with the most current information regarding durable plastic surface painting methods while taking into account practical concerns such as time and material compatibility.
Techniques for Achieving Even Coverage
Careful preparation, together with meditative application methods, is the secret to even coverage when painting polyethylene. The surface must be perfectly clean and dry, and no dirt, oils, or residues that might interfere with adhesion are allowed. The use of a plastic-specific primer will produce a smooth and uniform base layer for the paint.
When applying paint, it is always best to do it in several light coats instead of one thick coat. The spray can or spray gun should be held at a distance, usually 10 to 12 inches away, and movement should be in smooth, overlapping strokes so there are no drips or uneven textures. The drying time between coats should be as recommended by the product instructions, usually around 15 to 30 minutes.
Moreover, a well-ventilated work area with stable temperature and humidity levels will help to support an even finish. If possible, use a turntable or rotating stand to reduce handling and ensure that the application from all angles is consistent. Following these tips and being patient during the process will tremendously improve the quality and durability of the painted surface.
Expert Tips for Successful Painting
Dangers of Painting Plastic Wrongly Dismissed
⚠ Surface Too Rough
Among the biggest mistakes is cutting corners on surface preparation. Not cleaning and sanding the plastic properly might cause the paint not to stick properly. Cleaning the area with soap and water, and sanding it a little, are the steps that you should always follow to make sure the primer and the paint adhere well.
⚠ Paint Not Suitable
Using paint that doesn’t go with the plastic is another calamity to befall often. Standard paints may not stick on the surface or may peel off easily. Get yourself the paints that are expressly meant for plastic surfaces, those with either acrylic or oil-based formulas.
⚠ Foregoing Primer Application
Neglecting the primer application may lead to the formation of non-uniform surfaces and the attenuation of the paint life. The primer is vital because it serves as a smooth, sticky foundation for the paint to grab on to and later to extend the paint durability.
⚠ Paint in Thick Layers
Heavy painting usually results in drips, and unevenness, which can spoil the final outcome of the painted surface. It is vital to apply several thin layers with drying time in-between for the latter to result in an elegant and smooth finish.
⚠ Unfavorable Conditions for Painting
The overall result of the project might be affected by painting under conditions of high humidity, extreme temperatures, or poor ventilation affecting the drying process and the final outcome. Always paint under stable conditions, in well-ventilated areas, and with the temperature and humidity at levels that are most favorable for best results.
By steering clear of these common mistakes and putting in the effort, you will greatly improve the quality of your plastic painting projects, resulting in a long-lasting and eye-catching finish.
Lasting Results Guaranteed
It is a must if painted plastic projects are to last, to prepare them thoroughly as the first step. The dirt, grease, and dust that are the normal day-to-day and sometimes unseen enemies of the painted plastic surface should be thoroughly wiped out. The surface has to be treated so that the adhesion of the paint to the surface is maximized. If the treatment is through the application of a high-quality primer then the durability of the painted surface is further enhanced as it forms a strong base for the paint to adhere to effectively.
Moreover, it is the best to select a very upscale paint that’s used on plastic, in accord with the manufacturer’s warranty for the product. Opt for formulations that are able to accommodate the surface and resist cracking or peeling over the years. Apply primer and paint in thin, even coats letting each layer dry according to the manufacturer’s suggestions. The most recent industry arguments suggest that spraying the paint in a regular, controlled motion might help achieve an even look and lessen imperfections.
The project should be finished with the application of a clear coat that acts as a protective topcoat against fading, scratches, and wear. This step is particularly important for items that are constantly exposed to the sun or outdoors. Regular cleaning with gentle and non-abrasive methods is maintenance that should be done every now and then. Harsh chemicals should not come close to the surface as they will do more harm than good. By wisely taking these steps, you will be able to make a professional-looking paint job that is also long-lasting and visually attractive.
Daily Care Recommendations for Colored Polyethylene Goods
To keep the painted polyethylene items looking good and lasting longer, a combination of quality care and occasional maintenance is a must. First of all, the cleaning of the surface should be done often using a detergent soap combined with water, and the usage of non-abrasive sponges or brushes that could leave scratches on the finish should be avoided. For items placed outdoors, check them for any wear that shows up as paint peeling or cracking, and quicken the touching up process over these areas to counteract the damage done.
If the object is often sunlit, then a UV-protective coating should be applied since it will help the object to be less vulnerable to fading and discoloration over time. Besides, it will be a must to keep painted polyethylene items in cool, shaded places if possible, during hot and cold weather conditions. Research findings have shown that leaving painted polyethylene items in the cold or hot for long periods can compromise the integrity of both their paint and material structure. A once-a-year inspection and reapplication of sealants can enhance the longevity of the painted surface because it is usually done every year. By making these efforts, you can be sure that your painted polyethylene items remain not only functional but also visually pleasing for a long time.
Frequently Asked Questions (FAQ)
Q: What type of paint is best for painting polyethylene surfaces?
Choosing the right type of paint is always one of the main considerations when it comes to painting polyethylene. The most suitable products are usually those that are specifically made for plastic surfaces, such as paints specifically formulated for polyethylene or HDPE plastics. These paints have superior adhesion and are much more durable on account of the very peculiar properties of the plastic. Urethane and epoxy coatings are also considered ideal due to their strong bonding capabilities. Surface preparation and cleaning have to be done properly for maximum paint adhesion before application.
Q: How does surface preparation affect paint adhesion on plastic?
Surface preparation plays an indispensable role in obtaining good paint adhesion on polyethylene and various other types of plastics. To effectively modify the surface, a light scuffing with 320 grit sandpaper or the application of a flame treatment to oxidize the surface may be necessary. This helps to produce a rough texture which is more conducive for the paint to grip. Besides, the application of a primer can further augment the adhesion. Always let the primer dry thoroughly before putting on the first paint coat to get the desired results.
Q: Can I use latex paint on HDPE plastic items?
Applying latex paint on HDPE plastic objects may end up being a tougher task owing to the material’s chemical resistance. Although some people do report successful applications with latex paint, it is advisable to go for the specially formulated acrylic paints that are meant for plastic surfaces. These paints possess better adhesion and longer-lasting finish. If the latex paint is to be used, then taking adequate care of the surface by cleaning properly and applying right primer would be necessary. This will not only improve the paint’s adhesion but also its longevity on the HDPE surface.
Q: What are the common challenges when painting plastic surfaces?
Painting plastics, including polyethylene, is fraught with challenges. The main problem possibly is the very smooth and non-porous nature that comes with plastics, which is a significant hindrance to paint adhesion. Cream white colored plastic surface which has faded from sunlight exposure may need even more preparation, such as etching or using a propane torch to prepare the area for adhesion. Another way to go about it is to apply the wrong type of paint, which often results in peeling or flaking. Hence, using paint products that have been specifically designed for plastics is imperative to steer clear of these common pitfalls.
Q: How do I apply a thick coat of paint on polyethylene?
When it comes to applying a thick coat of paint on polyethylene, the very first step that you will have to take is making sure that you are using a product that is very much sprayable so that there will be no unevenness in the application. You should start with a primer that is specially designed for plastic to enhance adhesion. After the primer has been dried completely, you can then start painting. Go for a method that allows you to put on one or two thicker coats instead of many thin ones which will cause drips and uneven surfaces. Each coat should be dried thoroughly before the next one is applied so that you can get a smooth finish and a durable layer of protection.