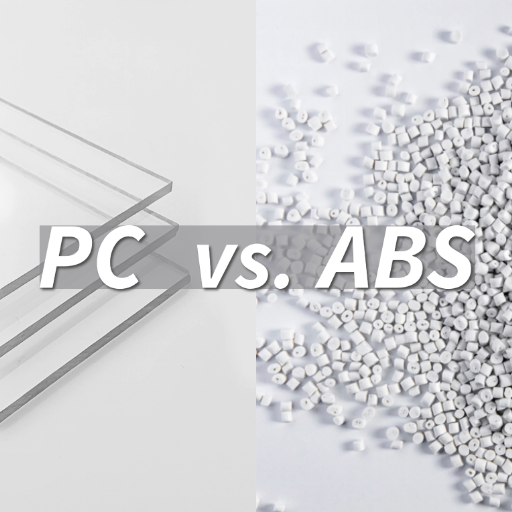
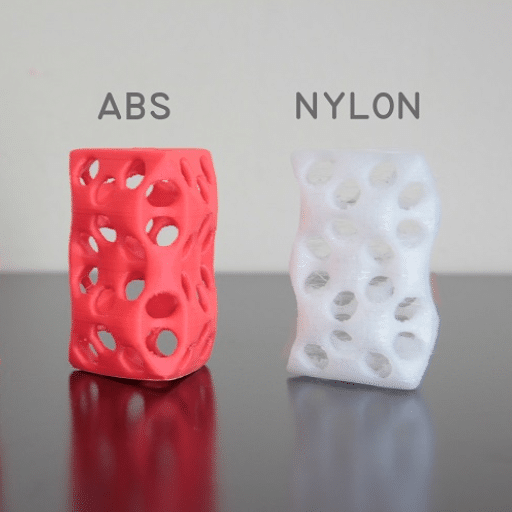
Cosmetic painting of objects made of ABS plastic is not an easy task owing to its non-porous and strong surface which, as a rule, resists any form of adhesion. But with the right strategy in the process, it becomes very easy to get the professionally smooth finished look that one wishes to attain on the objects made of plastic. This guide will take you through the entire process which includes surface preparation, primer choosing, as well as the painting and final coating steps. It doesn’t matter if your goal is restoring an aged component, creating a custom part for an unusual project, or simply wanting to hone your skills, this article will arm you with the know-how required for getting perfect results. The right tips and techniques, detailed in the following sections of this article, are what one essentially needs for converting the ABS plastic into a smooth and attractive renovated object.
What is ABS and Why Paint It?
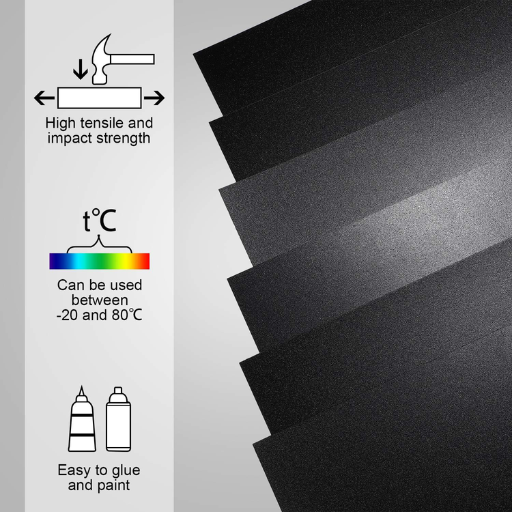
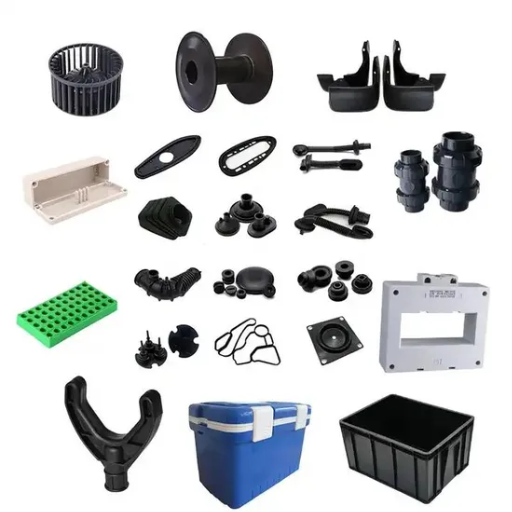
ABS (acrylonitrile butadiene styrene) plastic is a thermoplastic polymer frequently used in different fields because of its tensile strength, thermal endurance, durability, and light weight. It is often used in car components, domestic appliances, and 3D printing. Functional and cosmetic benefits can be achieved when painting ABS plastic. Engraving and painting the surface of the plastic not only provides protection against environmental factors such as moisture and UV radiation, but also improves the aesthetic appeal and shields the surface from weathering. Painting also serves the purpose of modifying it to fit design or branding purposes, thus, broadening the uses of ABS plastic.
Understanding ABS Plastic Properties
ABS (Acrylonitrile Butadiene Styrene) is a plastic type known as thermoplastic polymer. It is known for strength, impact resistance, and rigidity. It is considered one of the best options in the market because of its remarkable mechanical properties. For example, its tensile strength is around 40 to 50 MPa. Also, impact strength is approximately 15-25 kJ/m² depending on the material’s grade. ABS also has remarkable resistance to physical and chemical degradation, making it ideal for subjected stress, abrasion, or harsh environments.
This material also showcases remarkable thermal stability, exhibiting a glass transition temperature of approximately 105 °C, allowing preservation of its structural integrity when moderately heated. In addition, plastic ABS shrinks very little during the molding process, which is vital for accurate proportions in manufacturing. Its various methods of finishing, such as painting, plating, and machining, increase its versatility in other fields like automotive, consumer electronics, and manufacturing. These unique features accentuate Edmonton why ABS is still the plastic of choice for engineering-grade components.
Benefits of Painting ABS Plastic
There are several benefits of painting ABS plastic that make it appealing from an aesthetic standpoint for a variety of applications including:
- Improved Aesthetic Appeal
In terms of industry usages, painting ABS plastic allows for complete contouring which can be done in matte, glossy, or textured finishes. These can be used to fulfill marketing and design objectives in the automotive and consumer electronics industries. As cited in a report by the National Association of Manufacturers, around 68% of their consumers rely on product appearance which shows the value of surface customization.
- Enhanced UV Resistance
Encasing ABS plastic into paints ensures that surfaces do not degrade due to the sunlight, extending their lifespan. Products made for outdoor use can drastically benefit as it reduces discoloration, cracking, and brittleness which happens over time due to UV radiation exposure.
- Chemical Resistance
An extra layer of protection is added to painted ABS surfaces because its chemicals, oils, and solvents are protected against. This enables painted ABS parts to withstand more brutal conditions, such as industrial surfaces and automotive under-the-hood applications.
- Improved Weather Resistance
Covering ABS plastic with paint protective weather-resistant coatings protects against moisture, extreme temperatures, and other environmental concerns. For instance, such coatings are routinely used on automotive components for advertising and aesthetics to ensure reliable usage and usability for a prolonged duration and in varying weather conditions.
- Scratch and Abrasion Protection
The application of thick layers of durable paint greatly increasing resistance to scratches and surface abrasions enhances the overall structural and visual quality of the component. This is especially useful in processes where there is a high degree of manual or mechanical movement.
These advantages justify why painting ABS plastics is an essential step in enhancing the form and function of products across numerous sectors.
What Supplies Do You Need to Paint ABS?
To properly paint ABS plastic, the following items will be needed:
- Sandpaper (400-600 grit) – Used for the light sanding of the surface which improves paint adhesion.
- Isopropyl Alcohol or Plastic Cleaner – Is used to clean the surface and eliminate oils, dust, and other unwanted particulates.
- Primer for Plastics – It is critical for the adhesion of the paint to the ABS surface.
- Spray Paint Designed for Plastics – Delivers strong, smooth finishes to ABS.
- Painter’s Tape – It is used to cover the areas that are not supposed to be painted.
- Drop Cloth or Protective Covering – Used to cover the work area.
- Gloves and Safety Mask – Used to protect one’s self while cleaning, sanding, and painting.
All these items have to be employed in order to obtain a durable, ultra-smooth, and finely painted surface on ABS plastic. Always remember to use the right directions provided by the product manufacturers.
Essential Paints and Primers for ABS
When working with ABS plastic, the right paint and primer are needed for the required durability and adhesion. Besides, the final appearance must be pleasing. The best primers for ABS are those intended for plastic surfaces, such as adhesion promoters or plastic primers. These higners are compatible with severely nonporous ABS because they provide a primer bond that supports the topcoat.
When it comes to solvent-based paints, acrylic enamels or lacquer paints are highly recommended because of their exceptional bond and their resistace to chip or peel when used with a suitable primer. Also, top-grade spray paints marketed for plastic, such as polyurethane-based spray paints, offer enhanced UV protection and better-than-good quality finishes. It is essential to remember that paints should be applied in thin layers for precision.
Check the compatibility of the primer and paint system before proceeding to work with the parts. Make certain the manufacturer instructions to achieve the best results. Thoroughly sand, clean, and prime the surface in order to achieve long . lasting uniform finish.
Tools Required for a Successful Paint Job
To achieve a professional and long-lasting paint finish, one must use the correct tools and equipment. Below is a specific listing of tools needed for painting over ABS materials:
- Surface Preparation Tools
- Fine Grit Sandpaper (220-400 grit): Maintains industry standards for adhesion by eliminating surface irregularities.
- Cleaning Cloths and Isopropyl Alcohol (70% or higher): Grease, dirt, scraps of all sorts of paint is removed with water and sports drink powder.
- Plastic Putty Knife or Scraper: Removal of old paint, equally devoid of surface damage.
- Priming and Painting Tools
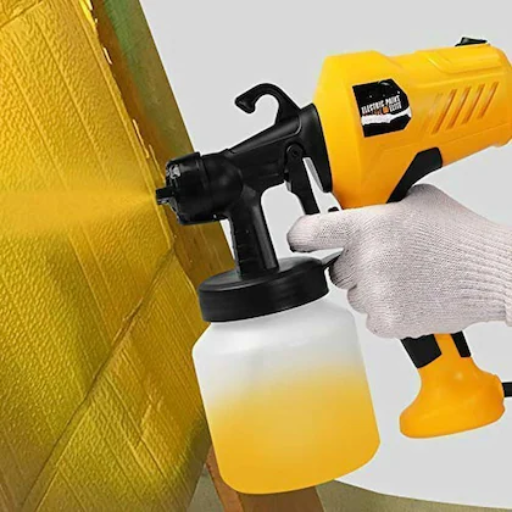
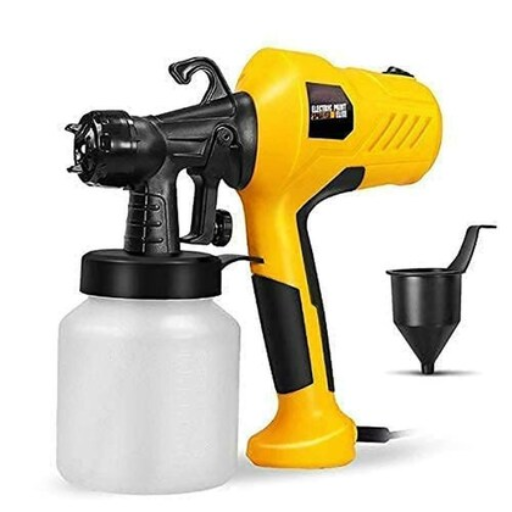
- Spray Gun or Airbrush System: Applies paint uniformly and sufficiently thin to primers and paints, preventing pooling or streaking. Fine meshed adjustable nozzles are preferable for fine work.
- High-Quality Primer: Specially formulated primers for plastics assure maximum adhesion and prevent peeling.
- Acrylic or Polyurethane-Based Paints: These coatings are flexible, durable and bond well with ABS substrates.
- Protective Gear and Safety Equipment
- Respirator Mask: Most important against inhaling spray paints and primers’ volatile organic compounds (VOCs).
- Safety Goggles and Gloves: Protective Chemistry expository as well as general safety gear for the process.
- Workspace Accessories
- Drop Cloths or Plastic Sheeting: Work station containment area from paint overspray.
- Rotating Work Stands: Permit the effective painting of all angles and surfaces without manual repositioning.
- Masking Tape: Provides clean defined edges while also protecting areas that are not intended to be painted.
By using these tools alongside an organized process in preparing surfaces and properly applying coats, one can attain smooth, durable, and professional-grade finishes on treated ABS materials.
How to Prepare ABS Plastic for Painting Process?
- Clean the Surface
Start with cleaning the surface of the ABS plastic like you’d wash a car, careful to remove every speck of dirt and the grease. Having a warm water with detergent or isopropyl alcohol will make things easier for scrubbing. Once done, put it in a place from where dust cannot settle on it.
- Sand the Surface
Start gently rubbing the surface of the ABS using fine-grit sandpaper. This process aids in increasing the surface roughness, resulting in better paint adhesion. Afterward, cleaning the surface using a lint free cloth is best.
- Apply a Plastic Primer
Primer can work wonders if one needs to make text stick to something. For people dealing with pesky age marks on the home, primer is arguably the best option. However, putting removable primer on other surfaces like shoes may turn out badly. Make sure it goes on lotion and shoe slips so the stuff is easy to remove.
- Inspect the Surface
Check what can be fixed while primer is waiting to dry. Make changes if you see it’s needed and tan a smooth layer of primer.
Sticking to rules during all the prep will help an individual’s work stand out for themselves and people who see one’s work.
Cleaning and Sanding the Surface
Cleaning and sanding are critical steps for achieving a professional-grade finish when painting on ABS plastic surfaces. To begin, the surface should be cleaned because dirt, oil, or contaminants that could affect adhesion must be removed. The surface cleaner or mild detergent should be rinsed with clean water and left completely dry afterward.
Use 220 to 400 grit sandpaper for the required smoothness. The surface preparation starts with the rough cleaning, which consists of surface cleansing with water, oil, and detergent. Use grit paper according to the smoothness needed. Maintenance of appropriate sanding pressure throughout the surface and constant checking of the cleaned areas are also vital. In this way, all the nooks and crannies are cleared of contaminants. The final washing should be performed with lint-free or tack cloth. All of these steps are proportionate to correct cleaning and sanding, letting you achieve the desired results along with increased resistance of the final surface layer.
Using an Adhesion Promoter
The bond between the paint and the ABS surface is ensured with an adhesion promoter. It alters the surface tension of the material and improves the adhesion of the paint. It also seamlessly integrates with the pyrolytic paint over the substrate to mitigate peeling, chipping, or premature degeneration of the coating.
For optimal results, select an adhesion promoter that is specific to the type of ABS plastic and paint system in use like the automotive-grade ones meant for plastics. The application needs to be done in a clean environment void of dust. Instruction guides should be followed properly for the spray or aerosol used, as individual models have different requirements. Drying time normally falls within 5-30 minutes. During this window, the substrate is expected to reach a tacky state which serves as optimal conditions for subsequent base coats. Proper use of an adhesion promoter offers an unrivaled advantage in underlying durability and performance of the painted surface so this cannot be bypassed in the finishing steps.
What is the Best Technique for Painting ABS Plastic?
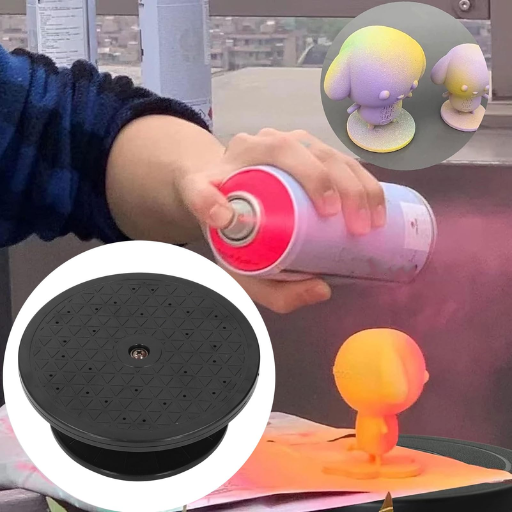
The best practice for painting ABS plastic requires following some specific steps that ensure good bonding, and a smooth durable finish. To begin, clean the surface using a low-abrasive detergent in conjunction with warm water to get rid of any dirt, grease, or residues. After the surface has dried, it can be sanded lightly with fine sandpaper (400-600 grit) to increase the likelihood of paint attachment by creating a roughened surface. Apply an adhesion promoter and make sure to follow the manufacturer’s instructions. Then appropriately apply primer, either an acrylic or a plastic-compatible primer, and let it dry completely. After, apply multiple light coats of paint, each layer wishing for the next, followed by a clear top coat for protection as well as to elevate the visual appearance.
Using Spray Cans vs. Spray Guns
|
Key Point |
Spray Cans |
Spray Guns |
|---|---|---|
|
Initial Cost |
Low |
High |
|
Equipment Required |
None |
Compressor and gun needed |
|
Portability |
Highly portable |
Limited portability |
|
Application Control |
Limited |
High |
|
Surface Coverage |
Suitable for small areas |
Ideal for large areas |
|
Paint Finish Quality |
Moderate |
Professional, smoother finish |
|
Setup Time |
Minimal |
Longer setup required |
|
Cleanup Effort |
Minimal |
Requires detailed cleaning |
|
Wastage |
More paint wastage |
Less paint wastage |
|
Skill Level Needed |
Easy for beginners |
Requires experience |
|
Suitable for Complex Surfaces |
Less optimal for intricate details |
Better for complex and detailed work |
|
Paint Variety Compatibility |
Limited selection |
Wider compatibility |
|
Drying Time |
Typically longer |
Generally shorter |
|
Durability of Results |
Moderate |
High |
How to Apply Base Paint and Color Coat
Adhesive action on the base of the body paint and the color coat is critical when it comes to achieving a quality finish on ABS plastic. As with any paint work, start from step one ensuring the work area is clean and organized. Clean the surface with a wax and grease remover as every single mark, no matter how small, will risk the level of adhesion. After cleaning the surface, spray it with plastic adhesion promoter, ensuring the coat is fine and uniform. This step is essential without which the paint may not adhere well to the plastic surface.
Using a high-quality airbrush or spray gun, as outlined in the first section, is crucial for evenly applying the base paint. Maintain a distance of roughly 6-10 inches from the surface when using the spray gun; this will allow for proper application of paint during light, overlapping passes. Do not try to cover the surface in a single thick coat; instead, build coverage with multiple thin layers. Each layer, in most cases, will need to flash dry, which in this scenario is 10-15 minutes for most products—though this varies with product, conditions, and environment—before the subsequent layer may be added.
Once the base is completed and fully dry, you may proceed to the color coat with base coat using the same application technique. Maintain a consistent spray pattern across passes, overlapping each one slightly to ensure no streaks or uneven sections. Based on the preferred outcome, color may need to be applied two to three times, all while respecting the flash dry time. Regardless, always follow the paint manufacturer’s recommendations for directional timings on dry and recoat windows. As noted, following the instructions will greatly improve the speed and quality of the paint application’s resilience and visual appeal.
Tips for Achieving a Smooth Finish
- Surface Preparation
Achieving a smooth finish starts with the right surface prep. This entails a clean surface, free of dust, old paint, and grease. Different types of substrates require the use of different types of solvents or primers, all of which must be dry before application. Use spend some time sanding the area, with gentle strokes, using 320 to 400 grit sandpaper, so as to create a smooth level surface. This adds to the adhesion of the paint. Lastly, clean the area with a tack cloth to get rid of dust.
- Choice of Tools and Equipment
Choosing the right tools can make a huge difference on the outcome. Smooth and even application is best achieved with spray guns, especially HVLP (high volume low pressure) ones as they provide perfect atomization. Make sure that the paint or coating is set to the correct nozzle size and spray settings. If using brushes or rollers, make sure to choose premium grade brushes or material specific to minimize tool mark impression.
- Paint Consistency and Mixing
Always adhere to the manufacturer’s instructions on ratios when mixing paints, with urethanes and epoxies as multi-part examples. Defective mixing can lead to inconsistent finishes which is termed as material failure. Ensure to check with a viscosity cup that the paint thickness complies with the recommended values for the tools to be used.
- Temperature and Humidity Control
Check also that the application region uses the recommended relative humidity which is ideally below 50% as well as the suggested temperature 60°F–80°F. Failure to do this can yield subpar results. Surrounding conditions heavily influence the curing and drying stages. For these steps to work smoothly, make sure the area is dry as well, since humidity above 50% can dampen drying speed, resulting in flaws like blushing, and cool conditions can hinder curing altogether.
- Application Technique
Keep a constant spraying distance of 6–10 inches from the object and maintain smooth, overlapping spray patterns. To achieve an overlap of 50% per pass guarantees even coverage. Maintaining a steady hand and speed helps avoid excessive paint buildup. Also, applying thinner, but uniform coats reduces the risk of sagging or dripping.
Following these detailed tips will yield an even and long lasting finish that looks and works well.
How Do You Finish and Protect Your Paint Job?
Start off by double checking that everything is dry before finishing and protecting your paint job. Apply the correct clear top coat for the paint and surface which adds durability, prevents scratches, and gives a polished look. If the painted surface is likely to be exposed harsh environments, sealant can be applied for extra protection. Maintenance requires cleaning with non abrasive products to keep the finish while using the top coat.
Choosing the Right Clear Coat
Investing time and understanding the different options available when choosing clear coats for your project is of great importance. It is particularly important to consider clear acrylic coats as they are extremely popular and simple to use. As a general-purpose clear coat, it serves multiple project uses and its ease of application, along with quick-drying properties, add to its versatility. Other clear coats, best suited for automotive and industrial use, are the 2K (two-component) clear coats as they become extremely hard and chemically resistant after a chemical reaction occurs between a resin and a hardener, making them perfect for industrial vehicles. Use 2K clear coat when needing something easy to paint, as those needing further mechanical resistance would require a more robust subject. Think of the environmental factors, surface type, and how long you want it to last while choosing the product. The right product ensures optimum efficiency while extending the durability and lifespan of painted surfaces.
Importance of Curing and Drying Time
Curing and drying time are critical factors that significantly influence the durability, appearance, and overall performance of a clear coat. When drying occurs, the first stage of the process begins and solvents evaporate from the surface where the dry clear coat is placed. Curing, on the other hand, is a chemical process which entails the application of intense ‘changing ‘ situations such as heat and power, defined as crosslinking, for the coating to harden fully. Different types of clear coats have different curing conditions that need to be met, furthermore temperature, humidity, air movement of the room also play an influential part during curing. As an example, polyurethane clear coats ordered from discerning stores will usually arrive after first 24-48 hours and then will require up to a week before standing up to serious chemical resistance.
Adhering to the timeline given by the manufacturer should always be met, resting above the recommended time will erode the coat-thin hard layer over time. Skipping these curing phases may trigger issues such as sub-coating/bonding faults (glues not sticking), poor surface finish, along with easily susceptible, strange bump-like formations termed as bubbling (surprising wear and tear), flimsy lack of holding power, weak holding bond, easy disruption of seals, etc. Drying takes more time, which works in people’s favor, when temperatures for wet curing are between 70- 85°F with balanced humidity. These changes will ensure the coating works and performs as intended when put to heavily manipulated state without loss of quality.
Reference Sources
-
How to Spray Paint Plastic – This article provides a step-by-step guide on cleaning, sanding, and spray painting plastic surfaces effectively.
-
How To Paint Plastic (and Make It Last!) – A detailed guide on preparing plastic surfaces, including cleaning, sanding, and ensuring durability.
-
How to Paint Plastic and Achieve a Smooth Texture – Focuses on achieving a smooth finish using wet/dry sandpaper and proper techniques.
-
The Secret To Painting Acrylic, Plastic, & Glass – Offers tips for spray painting plastic, acrylic, and glass, including advice on clean lines and surface preparation.
Frequently Asked Questions (FAQs)
Q: What types of paint can I use on ABS plastic?
A: You can use various types of paint on ABS plastic, including Krylon Fusion, Rustoleum, and automotive paint. Ensure the paint is compatible with plastics for the best results.
Q: How do I prepare ABS plastic prior to painting?
A: Prior to painting, clean the surface with dishwashing soap and water, then use acetone to remove any grease or contaminants. This will help the paint to stick better.
Q: Can I use automotive primer on ABS plastic?
A: Yes, using automotive primer is recommended as it helps create a better bond between the ABS plastic and the paint, enhancing the final glossy finish.
Q: Is it necessary to etch the surface of ABS plastic before painting?
A: Etching the surface can be beneficial as it provides a better texture for the paint to adhere to, improving the durability of the finish.
Q: What is the best way to achieve a glossy finish on ABS plastic?
A: To achieve a glossy finish, use a high-quality automotive paint and apply several thin coats, allowing each layer to dry before applying the next. Wetsanding between coats can also help.
Q: How do I ventilate my workspace while painting ABS plastic?
A: Always paint in a well-ventilated area to avoid inhaling fumes. Open windows and use fans to ensure fresh air circulates, especially when using aerosol products like Krylon.
Q: Can I use JB Weld on ABS plastic before painting?
A: Yes, JB Weld can be used to repair cracks or imperfections in ABS plastic. Allow it to cure fully before proceeding with the painting process.
Q: How long should I wait for the paint to dry on ABS plastic?
A: The drying time can vary based on the type of paint used and environmental conditions, but generally, you should allow at least 24 hours for the paint to dry completely before handling.


