




Marcus spent fourteen hours printing a custom cosplay helmet on his FDM machine. The geometry was perfect, the fit was exact, and the raw gray ABS looked promising under workshop lights. He skipped sanding, sprayed on two coats of enamel, and left it to dry overnight. By morning, the paint had formed visible ridges along every layer line, and within forty-eight hours, it started peeling at the brim in thin, rubbery strips. The problem was not the paint. It was the prep.
If you are painting 3D-printed ABS parts, you have probably faced a version of this story. Layer lines, porous surfaces, and weak Z-axis adhesion make printed ABS behave very differently from the smooth molded ABS you see in consumer products. The good news is that ABS is one of the most paintable 3D printing filaments available. With the right workflow, you can achieve a finish that looks indistinguishable from an injection-molded part. This guide covers the complete process from raw print to sealed paint surface, including the ABS-specific techniques that general 3D-printing guides miss.
Want to understand the fundamentals first? See our general guide to painting ABS plastic for substrate chemistry and primer selection principles.
Can You Paint 3D-Printed ABS?

Yes. ABS takes paint exceptionally well compared to most other common 3D-printing filaments. Its amorphous structure and moderate surface energy of roughly 35 to 42 mN/m give paints and primers something to grip. Unlike PLA, which resists chemical smoothing and can be finicky with solvent-based coatings, ABS can be vapor-smoothed with acetone before painting to eliminate layer lines entirely. Unlike PETG, which is more chemically resistant and harder to roughen for mechanical adhesion, ABS responds predictably to sanding and standard plastic primers.
The caveat is that FDM printing introduces mechanical texture and micro-porosity that molded ABS does not have. Paint will not hide layer lines. It will accentuate them. So while the answer is yes, the real question is whether you are willing to put in the prep work that painted ABS demands.
Why 3D-Printed ABS Needs Different Prep Than Molded ABS
Molded ABS parts arrive from the factory with relatively uniform surfaces, consistent wall thickness, and no internal voids. FDM-printed ABS is a different beast. The extrusion process builds parts layer by layer, creating stair-step geometry on curved surfaces and anisotropic mechanical properties. The XY plane is strong because the layers fuse laterally. The Z-axis, where layers stack, is the weakest direction. Sand too aggressively on a vertical face and you risk delaminating the part.
FDM prints also contain micro-gaps between extrusion lines. These pores absorb primer unevenly if the surface is not sealed first. You might spray a uniform coat of filler primer and still see dark spots where the primer sank into voids. Finally, filament quality varies widely. Virgin ABS pellets extruded under tight tolerance control produce smoother, more consistent layers than budget recycled filament. Off-grade material with inconsistent melt flow index creates wavy layer surfaces that require far more sanding to correct.
Understanding this matters because the finish of your painted part is limited by the quality of the substrate beneath it. The best paint job in the world cannot compensate for a porous, uneven print.
Materials and Tools Checklist
Gather everything before you start. Stopping mid-process to hunt for sandpaper or wait on a primer delivery invites dust contamination and handling errors.
- Sandpaper: 80, 120, 220, 400, and 600 grit wet/dry paper
- Acetone (for vapor smoothing, optional but recommended for ABS)
- Filler primer or sandable primer (Rust-Oleum Filler Primer, Duplicolor Sandable Primer, or equivalent)
- Spot putty or glazing putty for deep imperfections
- Isopropyl alcohol (70 to 90 percent) for degreasing
- Tack cloth for dust removal
- Spray paint rated for plastic (enamel or acrylic formulations)
- Optional: clear coat in matte, satin, or gloss finish
- PPE: respirator with organic vapor cartridges, nitrile gloves, and eye protection
- Ventilated workspace or spray booth
Not sure which primer to buy? Our guide to choosing the right primer for ABS breaks down adhesion promoters, self-etching primers, and sandable fillers.
Step 1: Remove Supports and Clean

Start by snapping away support structures. Use flush cutters for clean removal rather than pulling supports by hand, which can gouge the surface or tear off small detail features. For stubborn support interfaces, a sharp hobby knife works better than force.
Wash the part in warm soapy water to remove any residual oils from the build plate, handling, or packaging. Rinse thoroughly and let it dry completely. Once dry, wipe every surface with isopropyl alcohol on a lint-free cloth. Finger oils are one of the most common causes of paint adhesion failure on ABS. Even a single thumbprint can create a fish-eye or peeling spot later.
Step 2: Sand Down Layer Lines
Sanding is where most of the visual improvement happens. Start with 80 to 120 grit to knock down the tallest ridges and establish a basic shape. Work in small circular motions on flat areas and follow the contour on curved surfaces. Do not bear down hard on vertical walls. The Z-axis bond between layers is weaker than the lateral bond, and aggressive pressure can separate layers or round edges unintentionally.
Move to 220 grit for transition smoothing. From this point forward, switch to wet sanding. Water prevents the ABS dust from clogging the paper and produces a smoother scratch pattern. Progress through 400 grit, and finish at 600 grit for surfaces that will receive paint directly. You do not need to sand internal channels or hidden mating surfaces unless they will be visible in the final assembly.
Inspect the part under a raking light. If you still see distinct layer lines, keep sanding. Primer will fill shallow scratches, but it cannot hide geometry.
Step 3: Acetone Vapor Smoothing
This step is unique to ABS. Acetone dissolves the outer surface of the plastic, causing the ridges to flow together and form a glossy, smooth skin. No other common FDM filament responds to acetone this way, which is why ABS remains the material of choice for makers who want production-quality finishes.
There are two safe approaches. The vapor bath method uses a sealed glass or metal container with a small amount of acetone in the bottom. Suspend the print above the liquid on a wire rack. After 10 to 20 minutes, the surface will soften and gloss over. The brush-on method uses a slurry of acetone and ABS sanding dust applied with a soft brush. This fills small grooves while smoothing the surface, combining two steps into one.
Acetone is extremely flammable and produces strong fumes. Work outdoors or in a ventilated space with no ignition sources. Use glass or metal containers only; acetone melts many plastics.
Do not smooth parts with fine detail you need to preserve. Acetone rounds sharp edges. It also causes slight dimensional growth on the outer surface, so tolerance-critical parts may no longer fit. After smoothing, let the part dry for at least 24 hours before priming. Residual acetone trapped in the plastic will prevent primer adhesion and can cause bubbling or crazing.
Step 4: Apply Filler Primer
Filler primer is essential for 3D-printed parts. Unlike standard primer, which is thin and designed only to promote adhesion, filler primer contains solids that build up in grooves and level the surface. Spray 2 to 3 thin coats from 10 to 12 inches away, rotating the part for even coverage. Wait 30 to 40 minutes between coats.
Once the final primer coat is dry, wet-sand it with 400 to 600 grit paper. This flattens any dust specks, orange peel, or remaining layer-line ghosts. If you still see grooves, apply another coat of filler primer and sand again. Repeat until the surface looks uniform under raking light.
For deep imperfections that primer cannot bridge, use spot putty. Apply it with a small spatula, let it cure, then sand it flush.
Step 5: Paint
With the surface sealed and leveled, the actual painting is straightforward. Use enamel or acrylic spray paint rated for plastic. Hold the can 8 to 10 inches from the surface and apply light, even passes. Overlap each pass by roughly 30 percent. Resist the temptation to lay down a heavy wet coat. Thick paint runs, sags, and traps solvent that can attack the ABS substrate.
Apply 2 to 3 thin color coats, waiting the manufacturer’s recommended recoat window between layers (typically 10 to 30 minutes for aerosols). For the most uniform finish, paint all sides of the part in a single session. Stopping and returning the next day can create a visible texture difference where the new coat meets the old.
Looking for product-specific paint recommendations? See our guide to the best spray paints for ABS plastic for tested options and technique tips.
Step 6: Clear Coat and Cure
Clear coat is mandatory for functional parts, parts that will be handled frequently, or anything exposed to UV light. Unprotected paint scratches easily, and ABS itself degrades under prolonged sunlight. For display pieces that sit on a shelf in a climate-controlled room, clear coat is optional but still recommended for longevity.
Choose matte, satin, or gloss based on the look you want. Gloss shows imperfections most readily, so only use it if your prep work was thorough. Apply 1 to 2 thin coats of clear, using the same spray technique as the color coats.
Let the part cure for at least 24 hours before handling. Full chemical hardness takes about 7 days. During the first week, avoid stacking parts, wrapping them, or exposing them to high heat. ABS has a glass transition temperature around 105 degrees Celsius, but many paints begin to soften or discolor above 80 to 90 degrees Celsius.
Troubleshooting Common Problems
Even with careful prep, things go wrong. Here is how to fix the most common painting failures on 3D-printed ABS.
Paint peeling at layer lines. This almost always means the layer lines were not sanded flat or the primer was too thick and shrank back, pulling away from the ridges. Sand the affected area down to bare plastic, clean with IPA, and restart the primer sequence.
Primer still showing layer lines. You need more filler primer coats or heavier initial sanding. A rule of thumb: if you can feel the line with a fingernail, primer alone will not hide it.
Acetone over-smoothing. Fine details melt away or edges round off. Next time, reduce vapor exposure time to 5 to 10 minutes and check progress every few minutes. You can always smooth more; you cannot un-smooth.
Orange peel texture. The paint was applied too thick, the can was too far or too close, or the temperature was outside the recommended range (typically 60 to 85 degrees Fahrenheit). Sand smooth with 600 grit and re-coat.
Fish-eye. Oil, silicone, or mold-release contamination is on the surface. Strip the paint, wash thoroughly with degreaser, and wipe with IPA before restarting.
Color mismatch between batches. Spray cans vary slightly from batch to batch. Buy enough paint for the entire project at once, and mix multiple cans into a larger container if you need more than one for consistent color.
Filament Quality vs. Finish Quality: What Makers Should Know
Here is something no maker blog tells you: the quality of your filament is more important than your sanding technique. Virgin ABS pellets, extruded under tight tolerance control, produce consistent melt flow and uniform layer deposition. Recycled or off-grade filament has variable melt index, which creates wavy, uneven layers that are nearly impossible to sand smooth.
High-impact ABS grades produce tougher prints that sand without crumbling or chipping at the edges. Standard general-purpose ABS is easier to smooth but slightly more brittle under aggressive mechanical post-processing.
Moisture is another silent killer. ABS is hygroscopic. Filament left in humid air absorbs water, which turns to steam during extrusion. The result is bubbly, porous prints with weak layer adhesion. No amount of filler primer can fix a part that was printed from wet filament. Store your spools in airtight containers with desiccant, and dry filament at 80 degrees Celsius for 4 to 6 hours before printing if you suspect moisture uptake.
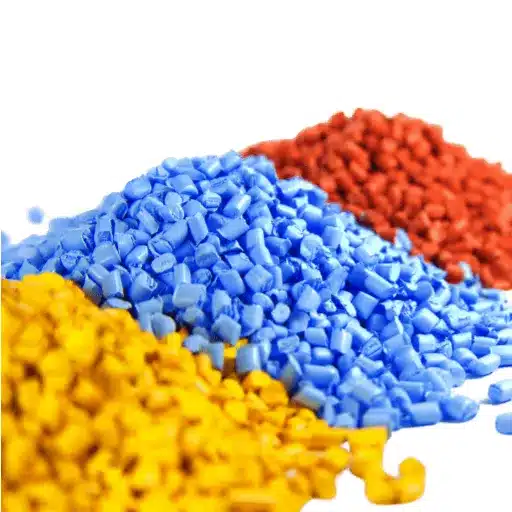
The ABS in your filament started as resin pellets. The same chemistry governs both FDM prints and injection-molded production parts. If your prototyping workflow is moving from 3D printing toward injection molding, the same grade-selection principles apply. High-impact ABS for durability, plating-grade ABS if you need a chrome or painted finish on production volumes. At Yifuhui, we supply both general-purpose and high-impact ABS resin grades with full Certificates of Analysis for every batch.
Request a quote for ABS resin pellets with material documentation and lot traceability for your next production run.
FAQ: Top Questions About Painting 3D-Printed ABS
Do you need primer for ABS 3D prints?
Yes. Filler primer is strongly recommended. Standard thin primers promote adhesion but do not fill layer lines. Sandable filler primer levels the surface and gives the color coat a uniform base.
Can you paint ABS without sanding?
Not if you want a smooth finish. Paint follows the existing surface geometry. It will make layer lines more visible, not less. Light scuffing at minimum is required even for functional, non-cosmetic parts.
How long should you wait after acetone smoothing before painting?
Wait at least 24 hours. Residual acetone interferes with primer adhesion and can cause bubbling or solvent crazing.
What is the best paint for ABS 3D prints?
Enamel or acrylic spray paints rated for plastic perform best. Lacquers can work but tend to be more brittle. Avoid paints with strong solvents like MEK or toluene, which can attack the ABS substrate.
Can you brush-paint ABS prints?
Yes, but spray application gives a smoother, more uniform finish. Brush painting is best reserved for small detail work, weathering effects, or touch-ups.
Will painted ABS withstand heat?
The ABS itself handles temperatures up to roughly 105 degrees Celsius. Most spray paints, however, soften or discolor above 80 to 90 degrees Celsius. Do not paint ABS parts that will see sustained high-heat operation.
How do you fix paint that peeled off an ABS print?
Sand the affected area down to bare plastic, clean with isopropyl alcohol, re-apply filler primer, and repaint. Spot repairs on ABS are difficult to blend; for large areas, it is often faster to strip and restart.
Is acetone smoothing safe?
Yes, with proper precautions. Work in a ventilated area, wear a respirator, eliminate ignition sources, and use glass or metal containers. Acetone vapor is flammable and the fumes are hazardous to breathe in concentrated amounts.
Can you achieve a glossy finish on 3D-printed ABS?
Yes. Acetone vapor smoothing produces a glossy substrate, and a gloss clear coat adds depth and protection. The combination can rival injection-molded surface quality.
Does filament color affect painting?
Darker filaments, especially black, can show through light-colored paint if the primer coat is too thin. Use an additional primer coat or a white base coat when painting over dark ABS with light colors.
Conclusion
Painting 3D-printed ABS parts is a six-step workflow: clean, sand, acetone-smooth, prime, paint, and seal. Skip any step and the finish suffers. Marcus learned this the hard way with his cosplay helmet, but the lesson is universal. Eighty percent of a professional-looking paint job happens before the color coat ever leaves the can.
ABS remains one of the best filaments for painted projects because it responds to acetone, takes plastic primer predictably, and offers the toughness that painted display and functional parts need. Whether you are finishing a prototype for a client review or building a durable cosplay prop, the material science is on your side if you respect the prep.
If your project pipeline is scaling beyond one-off prints and into injection-molded production, the same ABS chemistry applies. We supply paint-grade ABS resin pellets with verified COA documentation and consistent lot-to-lot properties. Get your custom ABS resin quote and we will recommend the right grade for your finishing requirements.